Setting Up the Citizen Portal
How to Enable the Citizen Site
- Log into the Mobile311 web portal and click on the Admin Site link.
- Click the pencil icon (
 ) next to the Client Name of the account.
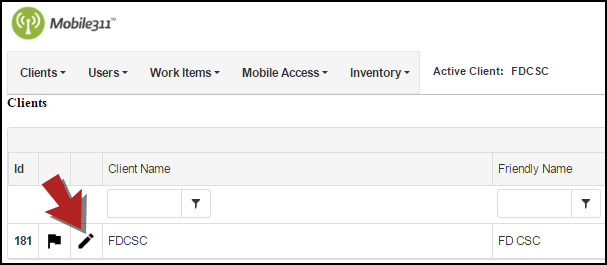
- The Client Name is what will be used in the Citizen Portal URL. If the name of your organization begins with "City of" or "Town of", we recommend leaving that out of the Client Name so your citizens will have a shorter URL to type when accessing the Citizen Portal. (For example: dude.mobile311.com instead of cityofdude.mobile311.com) *Note: Your Citizen Portal URL will follow this pattern: https://CLIENTNAME.mobile311.com.

- Check the box to Enable Citizen Site.
- There are 2 options for setting up the Citizen Site:
- You can require all citizens to create an account in order to submit a work item.
- Or you can allow citizens to either submit their requests anonymously or through an account they have created.
- If you would like to allow citizens to submit requests anonymously, check the box to Enable Anonymous Request. *Note: As a best practice, we recommend that you do NOT allow anonymous citizen requests. Anonymous requests do not give you the ability to identify who submitted the request if more clarification about the request is needed.
- Add your logo to the Citizen Site by selecting the file and clicking Finish Upload.

Enabling Work Types for the Citizen Site
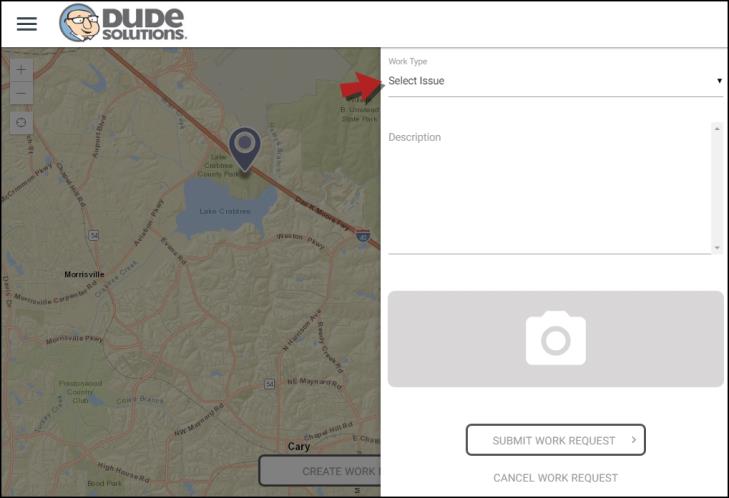
The only customizable field on the Citizen Site request form is the Select Issue drop down list. This is where the work types you have enabled for the Citizen Site will be listed for citizens to select from when submitting a work request.
How to Enable Work Types for the Citizen Site
Work Types are assigned to Login Groups. To make Work Types available on the Citizen Site, we recommend first creating a new Login Group called Citizen Enabled and then adding the appropriate Work Types to that Login Group.
- Log into Mobile311 web portal and click on the Admin Site link.
- Hover over the Users tab and select Login Groups.
- Click the Add New Login Group link.
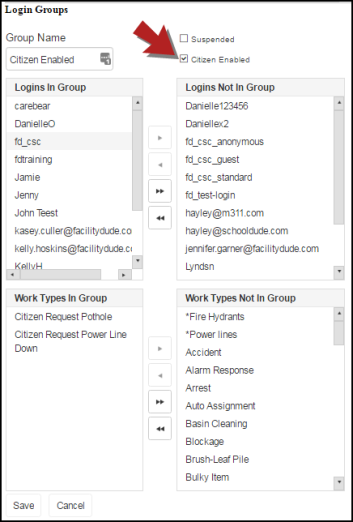
- Enter Citizen Enabled or something similar as the Group Name and check the Citizen Enabled checkbox.
- Select the Logins from the Logins Not In Group box and use the left arrow to add those users to the Login Group. Users with access to the Login Group will show in the Logins In Group box.
- Select the Work Types that will available to citizens from the Work Types Not In Group box and use the left arrow to move them over. Work Types that are a part of the Login Group will show under the Work Types In Group box.
We recommend that you do not reuse work types for both internal and external use. For example, if you have a work type called "Pot Hole", create a new work type called "Citizen Request_Pot Hole" for use on the Citizen Site. This makes it clear that the request was made by a citizen and can also help in your work flow process for handling citizen requests. It will also make reporting clear: what was created by citizens vs. what was created by internal users.
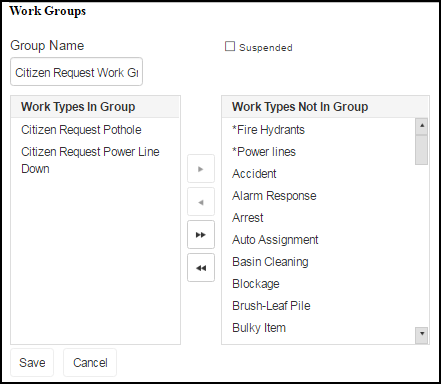
Because Work Types are assigned to Login Groups and you need Work Types assigned to Work Groups, it is also recommended to make a Citizen Request Work Group with the different Citizen Request Work Types assigned to it. You may also want to make the Citizen Request work types a different color from the internal use work types. This will help end users see the assignments on a map and also help to distinguish when a work request was submitted by a citizen versus a user in the account. *Note: Work orders submitted through the Citizen Portal will not trigger any auto assignment or automated email notifications associated with the selected work type.
- Click Save when you are finished.
|
|
